In part one of our hand-rendered text how-tos we show you not one but two ways to perfect easy hand-lettering with uni-Air.

A handy journaling skill
Having a choice of hand-lettering options at your disposal is great for so many reasons. It can pep up your lists, add some pizazz when you’re making handwritten notices or signs and is great for when you want to add some variety to your bullet journals.
Even if you’re not sure about your handwriting, do not fear! In these easy to follow hand-lettering step by steps we talk you through two easy hand-lettering methods on perfecting your ribbon script and Roman capitals lettering (pictured above). We’re using a uni-ball Air Micro rollerball pen.
Easy hand-lettering with uni-Air Micro

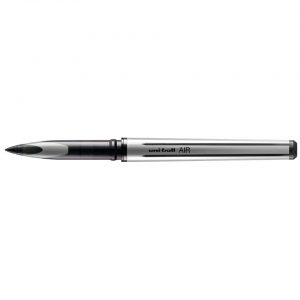
The uni-ball Air Micro is ideal for when you need the finesse of a fine ink script but the reliability of a rollerball. It writes like a dream; just pick up an Air and let the words come as the pen tip moves smoothly across the page.
The pens are perfect for a budding calligraphy buff who wants to impress with flowing, fine inky text. For a varied, stylish script, apply with a light touch for a finer line and give it a firmer pressure for a bolder edge. Plus it’s great for when you want these words to last. The Air writes with uni-ball’s famous Super Ink, which is fade and water resistant and tamper proof.
These reliable pens are available in black, blue and red, we’re using the black and red Air Micro’s for these two hand-lettering projects.
Ribbon script with uni-ball Air

This ribbon script step by step is a great first project when you want to get to grips with some easy hand-lettering with uni-Air. It’s very forgiving too – so it’s brilliant for boosting your hand-script confidence!
Easy hand-lettering with uni-Air – ribbon script step 1

First, sketch your letters out in pencil before going over with your uni-ball Air Micro pen.

Ribbon script step 2
Using your penned letters as an anchor, draw lines inside and outside the curves and edges as shown below.

Now colour them in with your pen. Colouring in the spaces you’ve created means that you neaten up any strange shapes or uneven, scruffy lines.

Wait for the rich black ink to dry on the page (that shouldn’t take too long), then erase any pencil marks on the page.

Roman caps with uni-Air Micro

Mastering a classic Roman caps script will really add an elevation to your hand-lettering projects. Traditional and imposing, it will give your journal pages and designs a touch of class. Plus you can adapt it to suit your style.
Easy hand-lettering with uni-Air – Roman capitals script step 1

Use a ruler to make sure your script is straight and the letters are the same height. These letters work by balancing both thick and thin lines to create harmony and shape with the letters.
Use your ruled lines as a guide. Sketch the letters out with a pencil as shown above, using a ruler to make robust anchoring lines for the straight letters and bulbous curves for ‘O’.
Step 2, define and colour

Use you uni-Air Micro pen, add horizontal lines where needed on your letters to shape your text as shown above.
Now colour in your text. You can opt for a solid covering – uni-Air is really effective for this as it gives you a dense, opaque colour.

Alternatively you can use the strong shape you’ve created for your text to act as a guide for more creative textures. We’ve used a lovely leafy design here but you could opt for stripes, or a criss-cross fill – it’s up to you, whatever suits your style.

If you’d like to see a bit more on how we created these letters, take a look at our easy hand-lettering with uni-Air video below…

